Monday, August 15, 2016

Remembering the good times, helps with the hard ones.

Being away from home is never easy. At least that has been my experience, I do try my best to enjoy the many positives we have at our new location. Nonetheless, it gets hard sometimes. Just plain hard. And, in these difficult moments there are times when I don't want to find the positives in my situation, I truthfully just want to sulk for a bit. 

Sorry: adult me doesn't want to be positive today. I will try harder tomorrow!!


This past week was a particularly difficult week to be away for home. In the small town I grew up in, yes the one I once longed to move away from, there is an annual golf tournament, I long to be back for, called the Northern. The Northern is a big deal to many people up there and our family is no exception. My dad is the superintendent at the golf course so it is always a busy time of the year for him both in his professional life and his personal life. My dad loves his job and he loves golf...like he LOVES golf! I do not know if I ever had an interest in something, especially a sport, like my dad does for golf. So, he obviously plays in this tournament each year, as well as, works through it. And, the really great thing is even though he is exhausted, he still loves it. For me, watching this exhausting love affair with golf has always been fascinating: inspiring in many ways; perplexing in others.  

Photo courtesy of Cheboygan Golf and Country Club Facebook page

Actually, most of my family golfs and many of the men come up and golf in the Northern each year. So, as a kid the week of the Northern usually meant I got to see all my uncles, aunts, and cousins from various parts of Michigan and Tennessee. We would all congregate at my grandparent's house, that somehow was perfectly located, no matter where you were coming or going from. I loved my grandparent's house. When I was old enough to drive, my favorite thing to do, was to stop by my Grandparent's house unexpectedly. The door was never locked, but they had a sliding wooden door separating the small entry way and kitchen. I will never forget the sound that door made and the look on both of their faces as you'd round the kitchen wall into the the dining room. "LIZZY, how the heck are you?" followed by huge smiles and hugs is usually the greeting I would get. And, most of my life I lived 15 minutes away, but they would greet me like that almost every time I came to visit. 

It was special. 

In fact, you could be at the house for 30 minutes sometimes and 3-4 more visitors would stop by in the exact same fashion.  Sitting at the kitchen table, hearing that wooden slider open is seriously one of my fondest memories. And it was exciting no matter who it was: my mom and dad stopping by after work, my brothers checking in on everyone, an uncle I had not seen for awhile, a friend of the families....it could have been anyone. I hope someday my house becomes a home like that. I truthfully didn't know you could love a house so much until after my grandpa had passed away and my grandma moved downstate. That house being sold and with it so many other changes always stirs up all kinds of feelings of loss and longing for days past...  

Okay, I am getting off topic...bear with me, I write like I think:

Anyway, having the entire family up was always an all around good time in my experience: 

Fun: yes. 
Entertaining: definitely. 
Drama filled: usually (that was half the fun). 

It was always beautifully chaotic. 

At any given moment you'd see card games being played, naps being had, food being prepared, children running around, people laughing...sometimes yelling...but, everyone together. 

I miss that.

I also miss watching my dad and mom go out each night and change the cups together for the next days tee times. If we were really lucky we got to ride along and help, it felt like a family tradition. Caddying for various family members on Sunday became a bit of a tradition as well. And whether or not you played, caddied, or were just a spectator you could bet that on Sunday afternoon you were at the course enjoying the festivities and cheering on your favorite golfers who were coming in on the perfectly placed 18th hole. 

The memories are really flooding in now! 

Back to being a kid growing up with access to the golf course there was nothing better then riding around in a golf cart...I mean unless you got to drive of course. My son got the opportunity to help when he was 2 years old, and yes that meant driving the cart! I cannot begin to express what that meant to me. To be lucky enough to have a close relationship with your family members is a blessing I truly wish everyone got to experience. I understand how rare these moments can be in this world and if you are lucky enough to experience them, treasure them. 


C-man helping Pop-pop change cups @ CGCC
Hold tight to them and refuse to see them as mundane and ordinary!!!! 

I think I could continue to write this post for days and days, but friends I think I just wrote exactly what I needed to say and more importantly needed to hear. Writing can be so therapeutic like that, even when you ramble on and use to many commas and exclamation points...my English teachers would be so ashamed. 

Yet, here I am feeling completely satisfied by my rambling and hoping, no praying, I helped anyone else with their hard time too. If you are having a difficult day and you just cannot find the positive let your mind wonder. Feel the sadness in your day and remember a better time, remember it to its fullest. Cry about it, but more importantly smile about it too. Hold tight to your good memories and see them as extraordinary, maybe tomorrow will be the day you make more or maybe it will take a little longer. 

Hold on either way friend. 


Monday, July 25, 2016

My first wedding cake

I have kind of been MIA for the last month or so, but those all important life moments have taken over and I have actually been super busy lately. Not to mention more pregnant and tired again...to all you ladies out there trying to do it all (pregnant or not) I give you props it is hard work!!
Busy or not I have been thinking of this post for the last month and am super excited to share my very first wedding cake with you all:


I got the opportunity to try my hand at cake baking for my Sister-in-Law's wedding in Michigan back in June. When first asked to make the cake I was super excited and pretty terrified at the same time! Baking while on vacation, in someone else's space, in hot-humid weather, for an outside wedding I was also standing up in...yeah, that was daunting. The amazing thing about this process was my super supportive family who made sure I felt zero pressure and had all the supplies/space/help/cheerleaders/grilled cheese sandwiches I needed. 

Thanks you again guys, you were perfect!

So, anyway back to the task at hand once I said yes to the idea I started my research! The last thing I wanted was a melting, sunken cake that couldn't hold up to the outdoor weather elements. I got a very quick, but thorough, education on proper cake baking and stacking. 

Here is my journey:

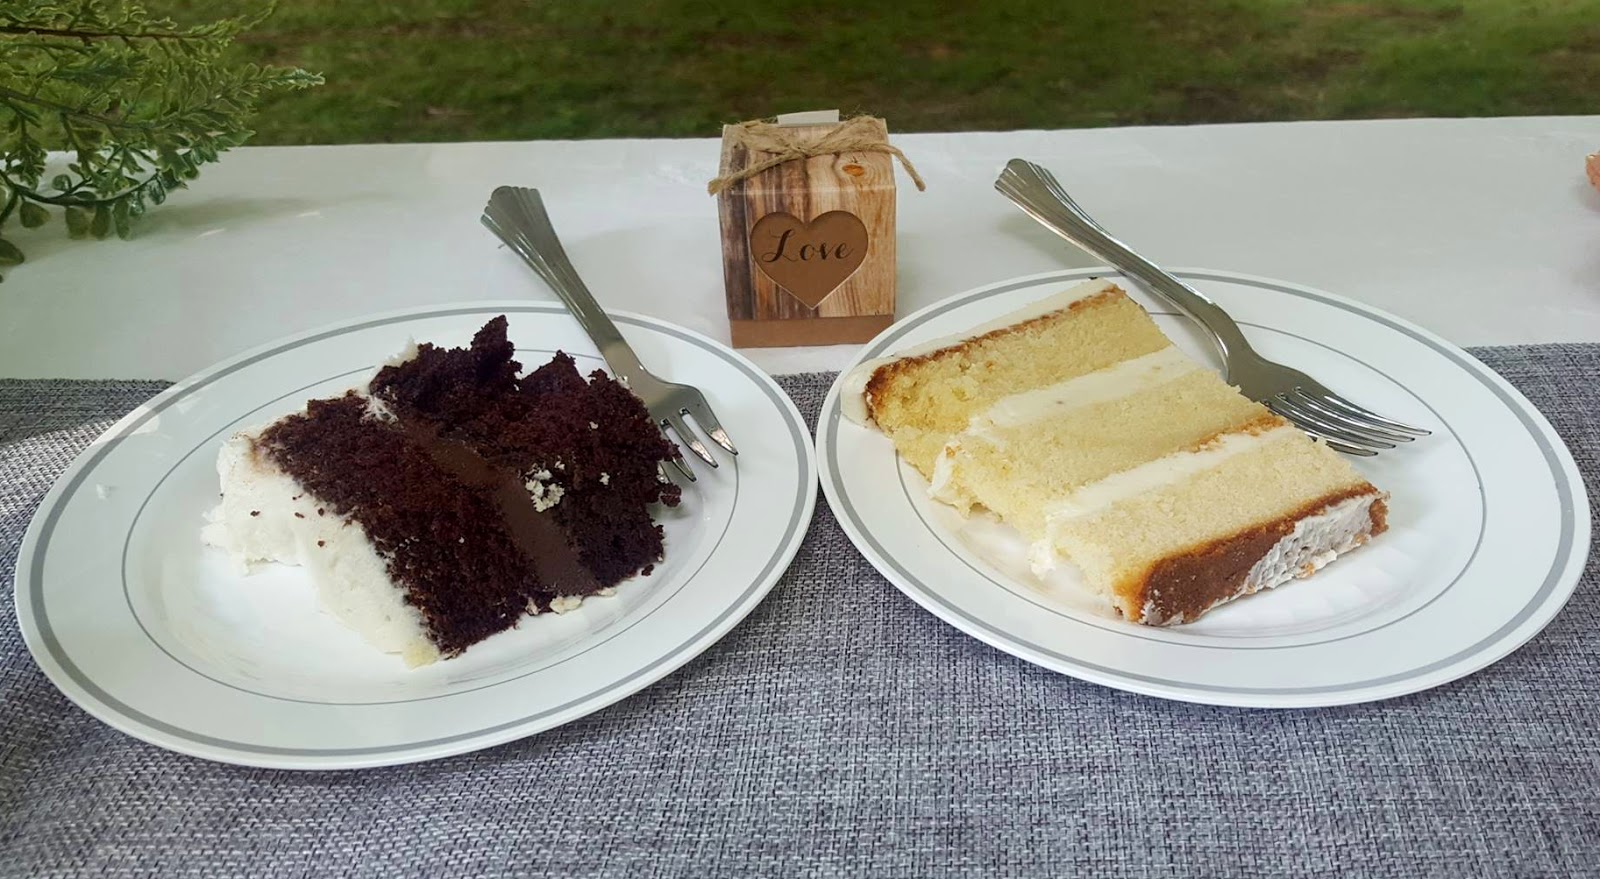
To start my Mother-in-Law and I decided on a 3 tiered, round cake design that would fit with the rustic, garden theme of the event. Then I got started on the flavor choices, which was the best part! Since my beautiful bride lives on the other side of the United States and she is super easy to please, I took the reins and designed the flavors to please the masses, while personalizing the top tier for the bride and groom. 

Below are the linked recipes I used:

Top Tier: Chocolate Guinness Beer Cake with a Mocha Buttercream filling for the bride and groom's love of all things beer and coffee...I mean what a perfect combination right!?! Let me just say that this was the first time I made the mocha buttercream and honestly it has become my new favorite! The coffee flavor has just the right intensity and pairs perfectly with the bold flavor of this chocolate cake. Seriously, try it you will not be disappointed!

Middle Tier: The {Best} Chocolate Cake with a rich dark chocolate ganache filling. My ganache is so simple it doesn't need it's own link, but it's so good that it probably deserves one...hahaha :) 

Dark Chocolate Ganache Recipe: 
Bring 1 cup of heavy whipping cream to a slow boil (stirring constantly) remove from heat. Pour over 9 oz dark bittersweet chocolate and whip together until chocolate is fully melted. To set the ganache to be able to use as a filling just refrigerate for 30 minutes. It should be a pudding like consistency. 

Bottom Tier: Classic White Wedding Cake with a vanilla buttercream filling. 
Classic, moist, delicious!


The exterior of the cake was covered in a crusting vanilla buttercream that held up to the elements perfectly! 

**The crusting vanilla buttercream linked above is not the recipe I used, however it is very similar. The truth is I make all my buttercream to taste so I often add more unsalted butter and whipping cream then is called for and I usually only use pure vanilla (no butter flavoring). I highly recommend experimenting with your buttercream flavors once you have the base recipe down. I like my flavors less sweet and more creamy/smoother then most recipes. Mainly, the key to the crusting buttercream is the vegetable shortening in the above recipe. It holds up to heat and it sets in the refrigerator so you can handle your cake without worry of denting it as easily. I also like how this particular recipe makes a large quantity, which of course you'll need for a cake!**  

I like to cool my cakes upside down to flatten the other side. 
What I can say about the baking process is: give yourself enough time. For this 3 tiered design I started on a Thursday evening choosing to bake and cool all the cakes, as well as, make all of the frosting on this first day. Follow your recipes carefully and make sure you have all your ingredients, baking tools, and check lists from the very start. I had to go to the store twice and I thought I was super prepared to start! 

Day 1: is messy, so make sure you have enough space to work, you're organized, and you clean as you go...that is a pro tip from my mother :) Furthermore, wrapping each cake tightly in plastic wrap and then placing them to chill in the refrigerator will help lock in the moisture of each cake.


Day 2 (Friday): This was the busiest day: cutting, filling, crumb coating, doweling, and finally decorating each tier.    

Pro tip: bring another shirt, yours will get dirty! And you may loose a button...Thanks Jane!
Cutting: Cutting each layer evenly is so important to how your cake will stack. Using a ruler and bread knife I marked my cake with 1 inch shallow, cuts all the way around. Then I slowly cut my cake all the way through making sure to carefully match up the previous cuts I had made. I worked with 1 tier at a time making sure to leave the other tiers chilling in  the refrigerator for as long as possible. Once my tiers were cut it was time for filling.

Filling: Filling is simple, just add your choice of filling in between your cake layers. Pay special attention to how thick you are filling each layer and that they are evenly filled. I would say mine had about 1/4-1/2 inch of filling to my 1 inch cake layer. Once your layers are filled and stacked back on top of each other use a level (I wrapped mine in plastic wrap to make sure it was clean) and gently press on your cake tiers until level. <-----This step may not seem important, but you'll thank me in the end! Furthermore, I always stack my cakes so the layer that baked on the bottom of the pan is flipped and becomes the top of you cake tier...simply because it is the flattest edge. For the ganache filling I first added vanilla buttercream around the edges then filled with ganache to ensure it didn't run out over the edge of my cake. Next step crumb coat!

Crumb coating: is simply a thin layer of frosting placed around each cake tier. Crumb coating will make sure your cake crumbs do not show through on your final product. When crumb coating use a separate bowl so that when your cake spatula gets crumbs on it you can still use it for the other tiers and you do not have to waste any frosting. Once you have crumb coated chill your cake in the refrigerator for at least 30 minutes before adding another layer of frosting, this will allow the frosting to harden and become easier to work with. Furthermore, don't worry about your tops or edges at this point because when the frosting is hard you can simply use your knife to cut off and smooth any edges. 

Image result for doweling a cakeDoweling: After crumb coating I dowelled my layers. This step is SO important and if you do it properly your cakes will not slump, will not fall over, or really even move an inch! Using wooden dowels I purchased at the craft store I simply measured my cake tier (had lots of help cutting them to size) and pushed them down into my cake. 4 (1/4 inch) dowels for my bottom 2 tiers pushed down until they hit cake board and them I used frosting to covers the holes they had made. I then saved 1 (1/2 inch) dowel to place down the center of my cake once it was completely stacked. Your cake boards should have a hole in the middle and if you stack them straight it should be very simple to push the larger dowel right down the middle of your stacked cake.   

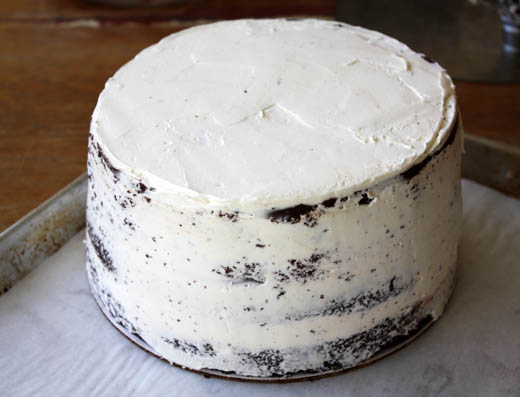
Decorating: The best part next to tasting! For this cake we wanted a simple rustic looking design. It almost reminded me of tree bark and was super simple to accomplish. I added my frosting, probably about 1/4-1/2 inch all the way around the cake, making sure it was pretty even to the cake board. Lucky, with this design I didn't have to make sure my frosting or edges were super smooth. I then used my cake spatula to lightly mark the cake all the way around each layer. I was trying to make the movements random and look more natural instead of planning out every move. This design was really simple and fit it with the event perfectly! Once done it was back in the refrigerator to chill over night. 

Day 3 (Saturday: Wedding Day): I chose to transport my cakes before stacking them, simply because I had about a 40 minute drive to the wedding location and was transporting the cakes alone. So, for this process I cut down 2 large boxes and gently placed each layer inside. To ensure they didn't move in the boxes I placed tin foil down in each box and added a nice smear of buttercream to the tin foil, as well as, each cake board...this process acts like glue to stick your cakes down, just like when you place them on your cake board to start. I had an awesome helper who packed the cakes tightly in the back of the vehicle and they didn't move an inch during my drive! 

And seriously Michigan you have my heart, but your roads suck!!

Picture courtesy of  PINKCAKEBOX.COM
Once I made it to the wedding venue I had a nice air conditioned camper to work in (Thanks Carl and Heather). This is where I stacked the cake using a large spatula to gently place each layer down. Once stacked, I made sure each layer was centered and I used a plastic wrapped level to make sure the entire cake was level prior to adding the final dowel. Once perfectly centered and leveled I used my largest dowel to place through the center of the cake all the way to the bottom tier...that baby was now locked in place!! 

The final step was finishing up the decorations including hiding each tier's edge, adding beautiful recycled paper flowers (are not these the coolest things), and adding the super, sweet cake topper. 

VOILA: Completion! 

And super simple right...


So, to wrap up I have to say thank you again to everyone who helped me with this creation! I love you all so much! It was a lot of work, but well worth it! 

Thanks Penny (MIL) and Scott (Hubby) for believing in me from the start and thanks Haley (SIL) for talking me down from the ledge a few times! 

Matt and Michelle your special day was amazing; thank you for letting me be a part of it in such a special way! I will cherish all the memories for a life time and of course I am not only talking about the cake ones :D 

Friday, July 1, 2016

4 super simple toddler-prek crafts for the 4th of July

Personally, I have to craft to stay sane. Period. I think it's safe to say I am passing that trait on...


Now, the Preschool teacher inside me loves process-focused art! The kind of art without instructions where children just get to create, explore, and grow any way they please with the materials you provide for them. However, I am also a fan of product-focused projects where children follow a set of instructions for a desired outcome. My point: there are benefits to every kind of art, I promise you that! 

This post is definitely focused on the product-focused projects and I tend to use the holidays as a good excuse to craft like this. Mainly,  I am both sentimental and want to use these projects as decorations for years to come, as well as, super cheap...and want to use these projects as inexpensive decorations for years to come :) 

Here are 4 super simple toddler to preschool age crafts for the 4th of July. They are quick, inexpensive, and fun!


The tongue of concentration
1. Hand Print Flag

Materials:
  • Red finger paint
  • Blue finger paint
  • White construction paper
  • little hands :)
Directions:
  1. Paint your toddler's hand (either one) blue and stamp on the upper left hand corner of the white construction paper. Wash hand after,
  2. Allow them to use their fingers to paint red stripes along the paper, leaving space for the white paper to show through, mimicking that of the American Flag,
  3. Left dry! 
Could it be any easier?! No way! You could do this project on a canvased bag, t shirt, towel, anything really just adjust the kind of paint so it doesn't wash off as easily. Tempera paint is good for fabric but hard to wash off hands. 

2. Red, White, and Blue Shooting Stars

Materials

  • (5) Popsicle (craft) sticks
  • red, white, and blue paint
  • (3) paint brushes
  • Elmer's glue 
  • (4-5 strips) Red and blue construction paper cut into strips (substitute with streamers, tissue paper, whatever you have)
  • Glue gun (optional)
  • Glitter (optional)
  • Wax paper (optional)
Directions
  1. Lay out Popsicle sticks on a sheet of wax paper (for easy clean up),
  2. Let your little one paint each stick either red, white, or blue,
  3. Have them sprinkle glitter on the wet paint or let dry completely if you are opting out of the glitter,
  4. Once dry, work together to arrange in a star shape and glue (I used a hot glue gun to make this part easier, but regular glue would work as well),
  5. Have little ones glue on strips of construction paper to look like a shooting star (this is a good time to do a pattern).

3. Paper Towel Roll Firework Stamps

Materials


  • Red and blue paint
  • 2 paper plates
  • A tissue paper roll cut in two
  • Scissors
  • White construction paper

I love the way this turned out!
Directions

  1. Cut paper towel roll in two equal parts. Then cut thin vertical pieces all the way around both rolls. Pull the vertical pieces out so they lay flat. (side note: wouldn't these paper towel rolls be fun to paint as octopus'...future craft idea),
  2. On one plate squirt red paint on the other plate squirt blue paint. You do not need much paint, just a thin layer on each plate,
  3. Each plate gets one tissue paper roll however, feel free to mix paints the effects are really pretty,
  4. Have little one dip tissue paper roll in paint and then stamp on construction paper.  
4. 4th of July Salt Painting

Materials

  • Red and blue food coloring
  • 2 small plastic containers
  • Water
  • White construction paper
  • Letter/number stencils
  • Red and blue sharpie
  • Elmer's glue
  • Table salt
  • Medicine dropper (optional)

Directions

  1. Fill each plastic container about half way with water add a few drops of red food coloring to one and blue to the other,
  2. On white construction paper stencil the words "4th of July" (or any other holiday related words, "ooh," "ahh," "firework," "celebrate," "boom," "bang," etc.),
  3. Let your little one squirt out Elmer's glue into each letter (zip zag, overlapping lines work best),
  4. Have them sprinkle salt on top of glue (lots),
  5. Shake excess salt into the garbage,
  6. With medicine dropper, have little one add drops of colored water onto the salt. My guy loved watching the water spread through the glue and salt,
  7. Let dry completely! 


Here is our "Holiday Wall" we change out with the season. My little guy helps me hang up each craft; he takes such pride in how it turns out. 

Have a great 4th and Happy Crafting! 

Saturday, June 25, 2016

"Once there was a tree...and she loved a little boy."

Read this book's text HERE
If you haven't read, The Giving Tree by Shel Silverstein, lately I implore you to do so. I rarely read it to my son, because as a super emotional mommy I can barely get through it without shedding some tears. I have "the feels" like no one else and can cry at the drop of a sappy dime. However, tonight after a wonderful day alone with him, just mommy and son time, I couldn't help but think of the story as I watched him sweetly fall asleep after a few books himself. The opening line played in my mind over and over, "Once there was a tree...and she loved a little boy." And I kept thinking: I am definitely that tree.

I am not equipped with the words to describe how I truly feel about him. I know that is a bit of a cop-out, but it's so true! Recently, I was lucky enough to have a short, but so meaningful, conversation with a new mommy. We were talking about how you really just don't know how much you'll love your baby until you do. And the feeling is almost indescribable and totally unbelievable. When I was pregnant with him I loved him, but I always worried that I wouldn't love him adequately. Like, what if I wasn't enough for him. And, then they are born and you still don't feel adequate enough, but you have no question on whether or not your love is. It is truly, perfect love.  

So, as I think about The Giving Tree, I can't help but think of all those parents out there who embody
that of the tree. Giving and giving and giving some more. And coming up with solutions to give even when you don't have exactly what is needed. Now, I'm not talking about the giving of frivolous things. Although, I do indulge my little guy on occasion (wink, wink) just for the simple joy of seeing him happy. Hey, I am completely aware of how much I was spoiled as a child and I do enjoy giving him that bit of non-warranted pleasure just because. Instead here, I am talking about the meaningful take everything that I have kind of giving that we do as parents. The giving of your time, your resources, your sleep, your youth, your plans, your branches...whatever they may be. And the selfless giving, that while you may complain about at the time, you would do over and over again just to make that little one (or not so little one) happy.

And, a lot of the time you may feel that, that kind of giving goes unnoticed, just like the boy in the story. However, if that boy is anything like most somewhere down the line, perhaps when they have little ones of their own, they will remember all that giving. They will get a taste of how sometimes that giving makes you feel empty, but with one little smile, or thank you, or I love you it fills you right back up to the brim. Hopefully, there is more gratitude then that of this story, but let's face it, we'd keep giving even if there wasn't. It's this point where I can see how some people, even Shel himself, believe this story to be a sad one. All that taking, all that sacrifice for what? Well guess what, I don't see it that way. I hope to get gratitude for all that I do as a parent, I hope to instill a sense of grace and humility into my little man. I hope to help mold him into a giving man who thinks of others first and if he doesn't I'd be saddened greatly. Let's be real sometimes all that giving pays off and sometimes it doesn't. Sometimes your happy...but not really (just like the tree). That's life. However, I'd keep giving either way. I am that tree.

I love him, most indescribably.

Now, I hope in years to come your beautiful babies visit you for a quiet place to sit and rest, as the boy did. And in all that sitting and resting I hope they are happy and I hope you are happy too. I hope you as parents understand your importance...


Thank you mom and dad for giving and giving and giving. No how much I understand all that you have done for me and understand how much I am grateful for it.


Wednesday, June 1, 2016

Our big reveal!

It was the big day!


The day we would get the chance to peek inside and see our little one growing. Our anxiety was high as we painstakingly waited for our afternoon appointment to arrive....seriously who schedules an ultrasound for this late in the day! 

Waiting is hard. 

While waiting, I prayed, the same prayer I had been praying for months, a variation of a common prayer most parents have said I am sure! A prayer for clear pictures of a healthy heart, developing brain, and growing body. I hoped for kicks and movements that I would be able to see and feel. And I excitingly, longed to see a sweet face and find out if we were going to be meeting a boy or girl soon....Are you longing for the same reveal?

 Well hold tight I am almost there, I promise! 

Teaser
 After we finally got into the doctor's office and they lathered me up with "the glue," (as the little guy referred to it) I started to relax. It's amazing to me, that at what should have been the most nerve racking moment, the moment the ultrasound technician isn't saying a word and you are just left to scour between the screen and her face, having zero luck trying to figure out what all those little blobs are or mean,  that I would be calm. All I can say, ladies and gents, is that God is amazing, and he knows when I need his calm and believe me that doesn't come naturally to me. He has provided me with His calm on many stressful occasions. So, in that relaxed moment I silently thanked him and waited, this time patiently. 

After a few minutes of pushing and shaking my belly; finally a few turns from side to side...we got to see our little one clearly. All the waiting was well worth it, but let me tell you...

Girl!
SHE is either very stubborn (my husband's guess) or prefers to be left comfortably, undisturbed (my guess) because getting a clear picture was a very difficult task. I thought my son's ultrasound was difficult having to be rescheduled (almost 2x) because he was curled up so tight, they couldn't get a clear picture of his heart. I was wrong! I am sure most of you have similar ultrasound stories, man it sure can be a high stress situation! Luckily, she looks healthy and the one clear image we got to see, twice actually, was that of her bottom (and perhaps a glimpse into her sense of humor)...and she definitely looks like a she!

"a sister! A SISTER!"
I cannot tell you how excited we are as a family! 

Daddy may already be worrying about his little girl's future too much. Brother is simply over the moon ecstatic. And I, while in shock, I mean I knew it would be one of two outcomes...we weren't getting a monkey after all...still in total shock am blissfully, happy. One of life's great surprises revealed! How special is that?! 

 I feel complete. 

Furthermore, my excitement grows as I get to share the news with you! It means everything to me that, although we are far from home, we have this amazing outlet and are able to let new and old friends experience this milestone right along with us!   


Thanks for reading and being here for us. 
Feel free to leave us a comment below.

It's a...proud big brother
And to our little ones, both of you, you are fearfully and wonderfully made and your mere existence means you are loved!   

Baby Girl <3
"Praise the Lord, for each day he carries us in his arms" Psalm 68:19 

Tuesday, May 24, 2016

Baby Pool

Let's have some fun! 

Make your predictions now and we will share the news in a super fun way on Wednesday, June 1st. Click HERE to enter our baby pool! In fact, make all baby predictions here and please let's get competitive people...in a really loving manner of course :)

*Helpful hint: "Baby Dos" is due October 31st*


Monday, May 16, 2016

My favorite cupcake tips!

My last post was deep, emotional, and a little needy...so...I thought naturally let's follow that up with my favorite cupcake baking tips! 

Cupcake images via: me :)

Let me just say I love everything about cupcakes! I love the endless possibilities they possess in terms of creativity and design, I love the heartache and headache they give me when a recipe fails, and I love the pure joy I get when they turn out beautifully! But most importantly, I love to eat them...I mean duh right?!

Backstory: I have this amazing family of cooks who have tried their hardest to teach me how to bake my entire life. However, baking was something I didn't understand and frankly had no interest in until one day...I just did! Now baking has ballooned into a full blown obsession of mine and I believe it is because of how difficult it actually is! I mean I started something seemingly simply, yet countless failed attempts and tears (for real) later proved to be anything but. To be a consistent baker, to truly understand the science behind the ingredients, is difficult and I am determined to succeed at it (see obsession)

So, in my pursuit of perfection I began to study the science of baking and I have learned so much since my very first vanilla cupcake! 
said first vanilla cupcake
After books, articles, videos and lots of trial and [mainly] error I've decided we should all bake more homemade cupcakes and below is a handy list I've compiled of my favorite baking tips to ensure that yours come out flawlessly:  

Tip #1: Start with ingredients at room temperature

This tip is #1 for a reason, it is the most important! Numerous times, while in a rush, I've used ingredients right out of the refrigerator and it makes a huge difference in your baking! When your eggs are not room temperature your cakes fall flat, quiet literally, and you do not get those beautiful rounded, springy tops once they bake. Now, I have cheated a bit on this step and placed my eggs in the microwave for a few seconds and that seems to work as well. However, I still think you get the best results by just letting them sit out and slowly come to room temperature. Furthermore, room temperature butter is needed to get the proper creaming of your butter and sugar, which is often the first and most important step in your cupcake recipe. When creaming your butter and sugar make sure to whip butter first in your blender, at a low speed before slowly adding in your sugar. By using room temperature, unsalted butter and slowly adding your sugar you are ensuring that your ingredients emulsify correctly without breaking them down. Also, I have yet to be able to over-whip in the creaming stage, you want your butter to be very creamy, but over-mixing does become a problem later on: see Tip #6

Image via: Tinytestkitchen

Tip #2: Use unsalted butter

Before baking I had know idea there was such a thing as salted vs. unsalted butter, but holy cow in the baking world it's huge and it matters. When a recipe calls for unsalted butter go to the store, pay extra, and buy unsalted butter. Your recipe is telling you, you need to control the amount of salt and by adding another salted product (like salted butter) it will change the taste and texture of your end product. Furthermore, unsalted butter holds up way better in your buttercream recipes! Believe, me if you have ever got the slowly sinking and melting away buttercream look, this is an important ingredient to have! 
Image via: all-foods-considered

Tip #3: Study your recipe
Do not skim your recipe, read it thoroughly! Why...because science again! A baking recipe is not like a cooking recipe it is not a suggestion. You need to know your ingredients and measure them out carefully, especially baking powder and baking soda. They are not the same, although they are both leaveners, they are chemically different and when mixed up it makes a huge difference in the structure of a cake. Additionally, I often times get distracted or interrupted while I bake [hello, 3 year old] so I find it helpful to check off my ingredients as I go! Trust me, I've learned this tip the hard way...
Every recipe I have is marked in some way or another!

Tip #4: Use pure vanilla 
I am a super frugal [cheap] person! However, quality ingredients make a difference in baking and the biggest bang for your buck and taste-buds, in my opinion, is the switch to pure vanilla extract. Come on it is not that much more and it really changes the flavors of your cakes and frostings I promise!

Bonus tip: use clear extract to keep a crisper, white frosting. Dark extract will make your frosting a more antiqued color. 
Image via walmart.com

Tip #5: Alternate wet and dry ingredients
Martha Stewart first taught me this :) I split my wet and dry ingredients up and pour about 1/3 of my mix in, in an alternating manner. This ensures that your ingredients get properly mixed together and if you use a slow mixing speed it doesn't break down any of your ingredients. I always end my mixing with a liquid just to keep those batters super smooth. 

Tip #6: Be mindful not to over mix
Once you are past the creaming stage (butter and sugar) of your cupcake (or cake) recipe be mindful not to over mix your batter. Mix your ingredients until they are just combined. This will keep those important air bubbles in tact [science] and allow your cakes to stay airy and fluffy. 


Tip #7: Measure your batter
When I first started making cupcakes my pans were always uneven! I would have undercooked, overcooked, overflowing, uneven cupcakes and the reason was quite simple: I didn't measure my batter when filling my cupcake liners. So now I use a every day ice-cream scoop and voila perfection; they are always even! Also, my scoop makes for an easier clean up and less batter drips on my pan :)

imagine via: usefulthings.com
Tip #8: Know your oven (no early peeking & bake in the center)
Don't be a peeker!! This is the hardest tip for me, I want to peek! I want to open the oven and look at my little babies to make sure they are all thriving, but you must fight your maternal baking instincts. Opening your oven early will allow your heat to escape and your cakes are likely to fall flat. If you must peek wait till they are 90% done just long enough to do the bounce back test (do the tops bounce back up when you lightly push on them? If they bounce back completely take them out!). Also, it's really important to know the temperature of your oven and how it bakes. Lots, and lots, and lots of times I have cooked in other people's ovens and my cupcakes have come out differently. That is because all ovens cook differently, know yours before baking! If your internal temperature is too hot your cakes are more likely to over cook, just turn down the temperature slightly. If your oven is hotter on top your cakes are likely to bake uneven and have harder tops. Make sure to bake on the center rack in the center of your oven, without overlapping your pans, to ensure proper airflow and even baking.

Tip #9: Cool cupcakes immediately 
Once your cupcakes come out of the oven take them out of the pan and begin the cooling process immediately. Of course, the reason behind this tip is to prevent over baking and a dry cake. Lots of bakers use a wire rack to cool their cupcakes, which certainly works, but I just flip a cold cupcake pan over and cool them that way. Basically, I just use the tools that are available to me and when I started baking I didn't have a cooling rack; later I realized I didn't necessarily need one. Do what works for you! 


Tip #10: Store your cupcakes properly
Your goal as a baker is to make super moist, yummy cupcakes and how you store them is a big factor in if you'll be successful! Use an airtight container to store your cupcakes and keep your cakes at room temperature if at all possible. I rarely refrigerate my cupcakes and the times that I have they dry out so quickly it is unbelievable. Your cupcakes should stay super moist for 2-3 days (or more), at room temperature, if stored properly. Furthermore, wait to frost them if you can. I like to whip up my frosting in advance, keeping it in an airtight container in the refrigerator, until the day I need my cupcakes...this is ideal of course. Sometimes you need to frost right away and that is ok! Still keep your cakes in a good container at room temperature and your frosting should be able to hold up just as well! I plan on doing another post with frosting tips that will help aid you even further in this step :)

Bonus tip: you can freeze cupcakes and frosting (separately of course) using a good freezer bag or container. Let them both defrost at room temperature the day you need them or night before. I always whip my frosting, while it is still cold, to make it nice and smooth again.


Well, there you have it friends, my favorite cupcake tricks and tips! I hope you enjoy them and find this post super helpful on your baking endeavors!! 

Happy baking!

**please if you have a baking question come up post it in the comments, I love to help!**